
Keycloak installation and configuration |
The Keycloak official website download address is https://www.keycloak.org/downloads. And for installation requirements, refer to its official documentation. Here we take win64 as an example to install Keycloak.
Download keycloak-4.0.0.Final.zip, extract the file, double-click the standalone.bat in keycloak-4.0.0.Final/bin directory, then you can start Keycloak service.
The Keycloak's local access address is http://localhost:8080/auth/, click on the “Administration Console” on the page, and create the Keycloak administrator account, which is used to configure in Keycloak, manage users , roles, etc.
You can also specify the IP and port on the command line to start Keycloak service as following:
In the keycloak-4.0.0.Final/bin directory, execute the following DOS command:
standalone.bat -Djboss.socket.binding.port-offset=100 -Djboss.bind.address=192.168.112.172
Access http://localhost:8080/auth/, click "Administration Console" to enter the Keycloak login page, input the administrator account to log in to Keycloak service. Keycloak defaults to use English, it also supports other languages, you can follow the steps below to enable Internationalization function.
Click "Realm Settings" in the left navigation bar, and select the "Themes" tab on the right panel of the page. Select "keycloak" for the "Login Theme", "Account Theme", "Admin Console Theme" , and "Email Theme" items. Turn on "Internationalization Enabled" button, the "Supported Locales" will list all the supported languages. On the "Default Locale", you can set the default language for Keycloak service, finally click the "Save" button. After logged out, on the login page, you can select one language to log in to Keycloak.
Take English version as an example, now you need to do the following configuration.
Keycloak's default realm is Master, you can use the default Master domain, or you can add a new domain. Move the mouse to the left corner drop down menu that is titled with "Master", click "Add realm", enter the realm name, for example: ispeco, then click the "Create " button to enter the newly created ispeco realm page, then perform the following configuration. Note the resources between the realms (including users, roles, clients, etc.) are isolated from each other.
In the left navigation bar, select "Clients", then click the "Create" button on the right side of the page to add a client:

Finally click on the "Save" button.
Note: " Valid Redirect URIs" is to fill in the application (service) system (URL) allowed by Keycloak to use Keycloak's authentication and authorization service. It supports multiple urls. The recommended format is: /* after the service root address.

Note: "secret" is the client key, which is consistent with the "client key" of the "Keycloak login configuration" in SuperMap iServer/iPortal/iEdge.

Descriptions:
Now you've done the all the configuration in Keycloak to link with SuperMap iServer/iPortal/iEdge, but you still need to do more settings in SuperMap iServer/iPortal/iEdge to complete the whole linking job. For details about confguring in SuperMap iServer/iPortal/iEdge, see: the Keycloak configuration of the SuperMap wagon is completed. Next, you need to configure the docking with Keycloak in the troika. For details, see: Configure to use_Keycloak.
Take the created ispeco realm as an example to create a client. The client ID is named: iDesktop, which is a client ID name stipulated by SuperMap. The configuration is as shown below:

Click the "Save" button to enter the detailed configuration page:

Note: "Valid Redirect URLs" fills in urn:ietf:wg:oauth:2.0:oob.
At this point, the Keycloak configuration of the linking SuperMap iDesktop is completed. When you open SuperMap iDesktop, you can log in to SuperMap iServer/iPortal/iEdge directly to get the resources using the account in Keycloak.
Click on "Roles" in the navigation bar to add roles. You can create multiple roles according to your needs. It's recommended that the role name is consistent with the role name in SuperMap iServer/iPortal/iEdge, for example: DATA_CENTER, which will be displayed as "KC_DATA_CENTER" after adding the prefix KC_ in "Attribute role associated information configuration" in "Keycloak login configuration" in SuperMap iServer/iPortal/iEdge.
Once you've added the roles, you can start to create users. Keycloak allows adding users directly by the administrator and by opening user registration.
Administrator add users
As an administrator, you can add a user by clicking "Users" on the left navigation bar on the Keycloak management page. Then fill in the user information. The user name is required. The rest can be filled in according to the requirements. Click “Save” button after completion.

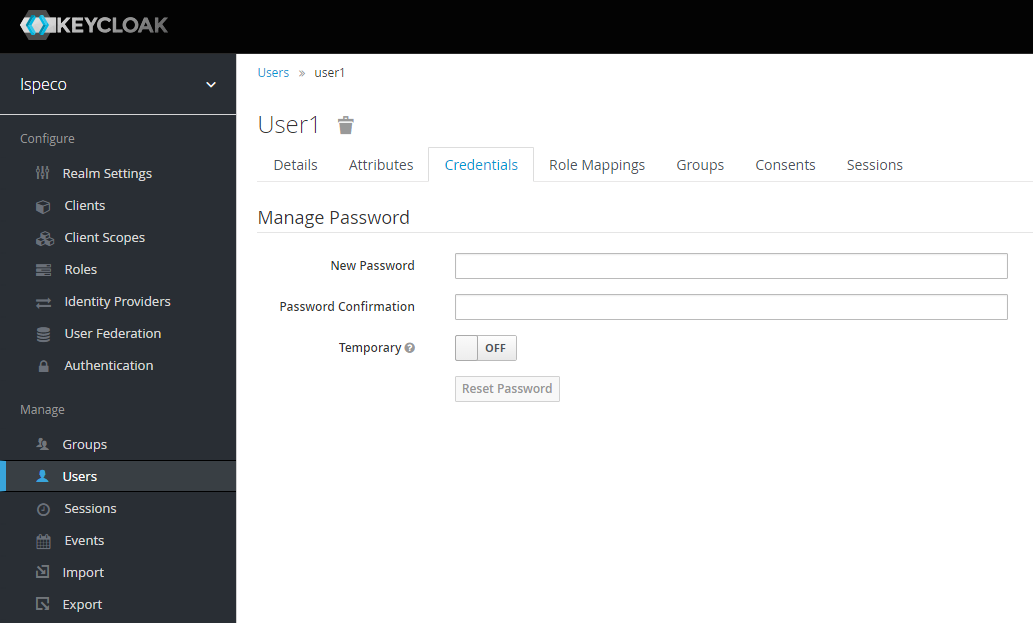
Select the "Credentials" tab, fill in and confirm your password, and turn off the "Temporary" option.
Select the "Role Mappings" tab, select the role you want to assign to the user, and click the "Add Selected" button to complete the assignment of the role. At this point, adding user process is completed.

Open user registration


